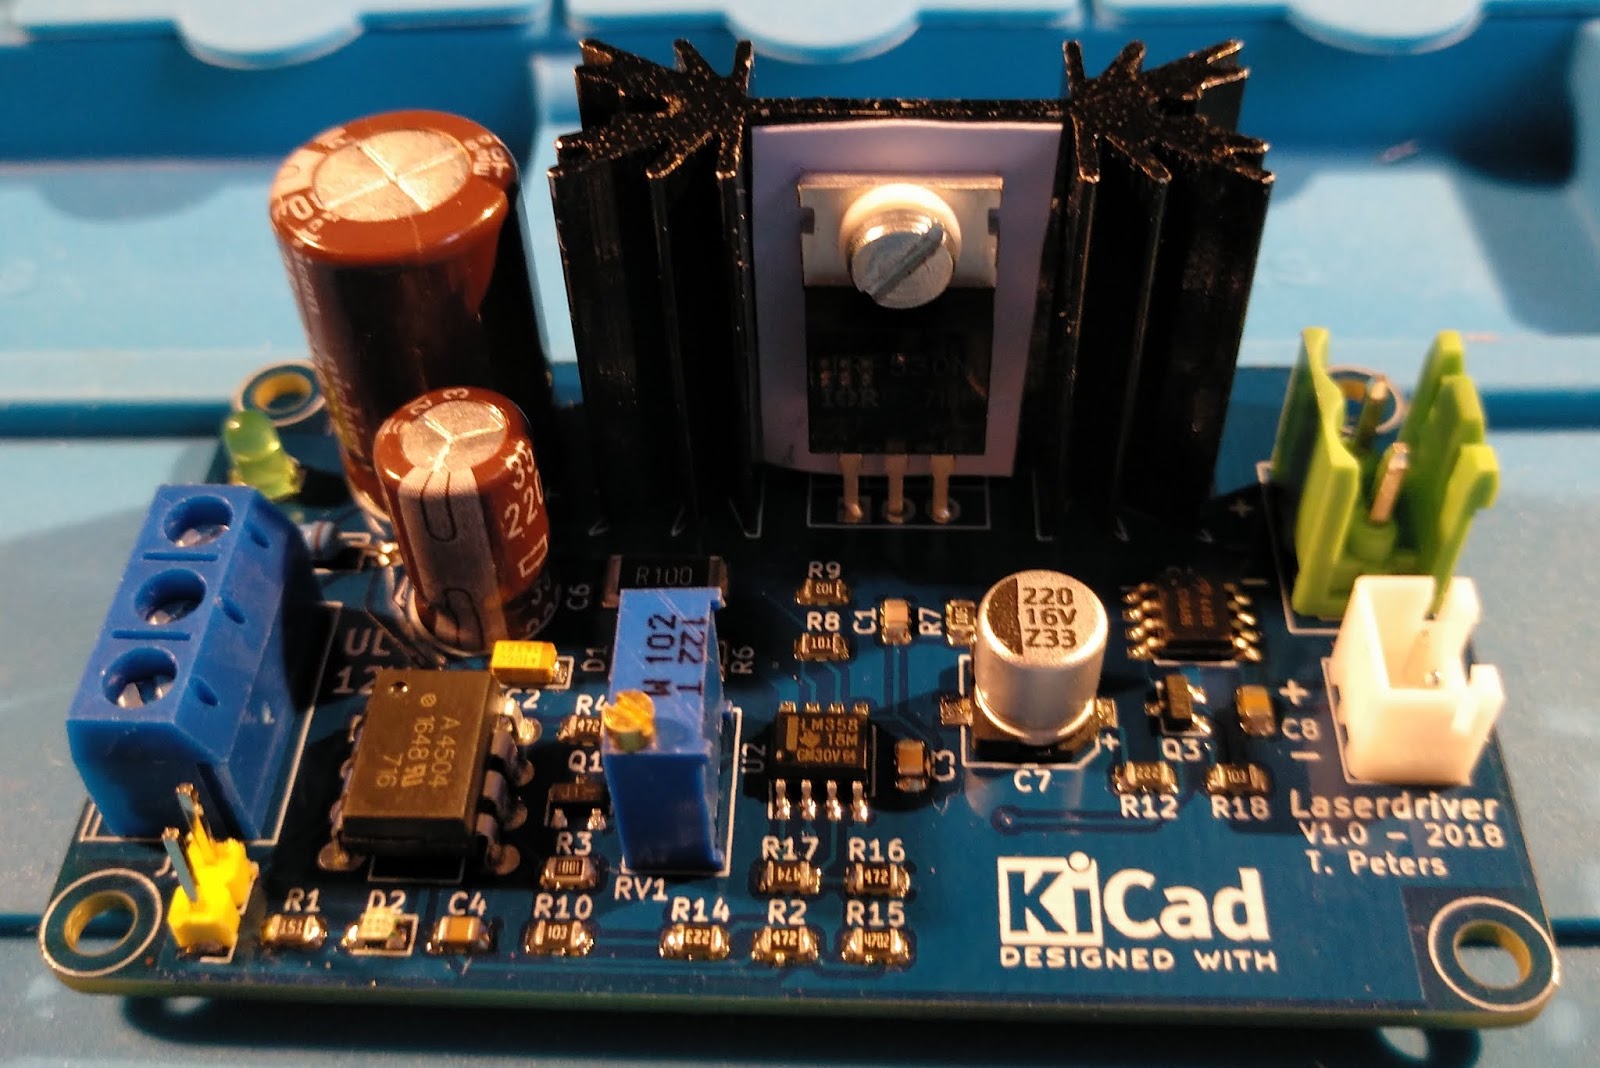
Strömlinge DIY GRBL 0.9+ board for Arduino Nano
grbl defaults to interpreting coordinates in millimeters; this may also be explicitly set with a G21 command. With these parameters, G91 G0 X100 represents a 100 mm move at the maximum speed of 500 mm/min, with an initial and final acceleration of 10 mm/sec^2. The $100=250.000 parameter shows an assumption of 250 steps/mm; in actuality, the physical scaling depends upon the specific stepper.
Grbl 0.9 Download operfscout
As of Version 0.9, GRBL supports PWM for controlling variable spindles and lasers. (Both our Arduino CNC shield (V3.10+) and Raspberry Pi CNC Boards support the PWM functionality. ) To use the functionality there are two parts to look at. The first part is the way GRBL firmware is set up when compiled. Luckily most of it will work out of the box.

Купить grbl 0.9j, usb гравировальный платы управления, контроль 3 оси, лазерная гравировка
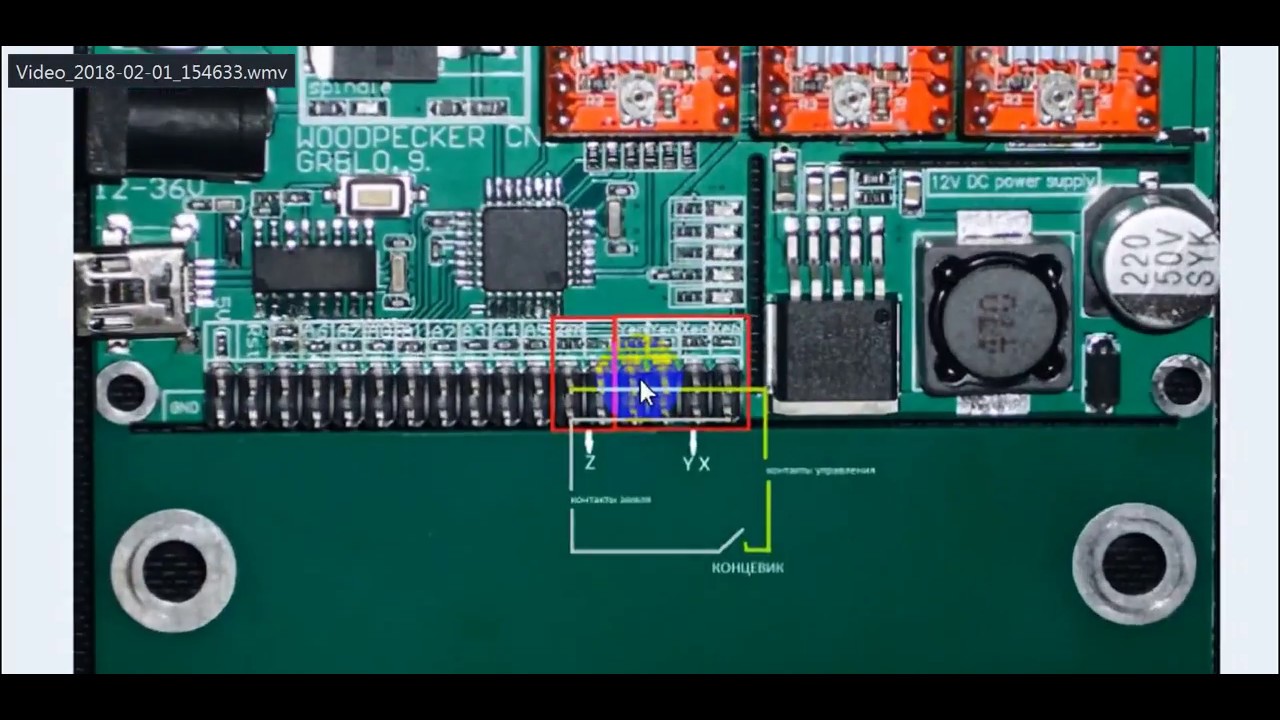
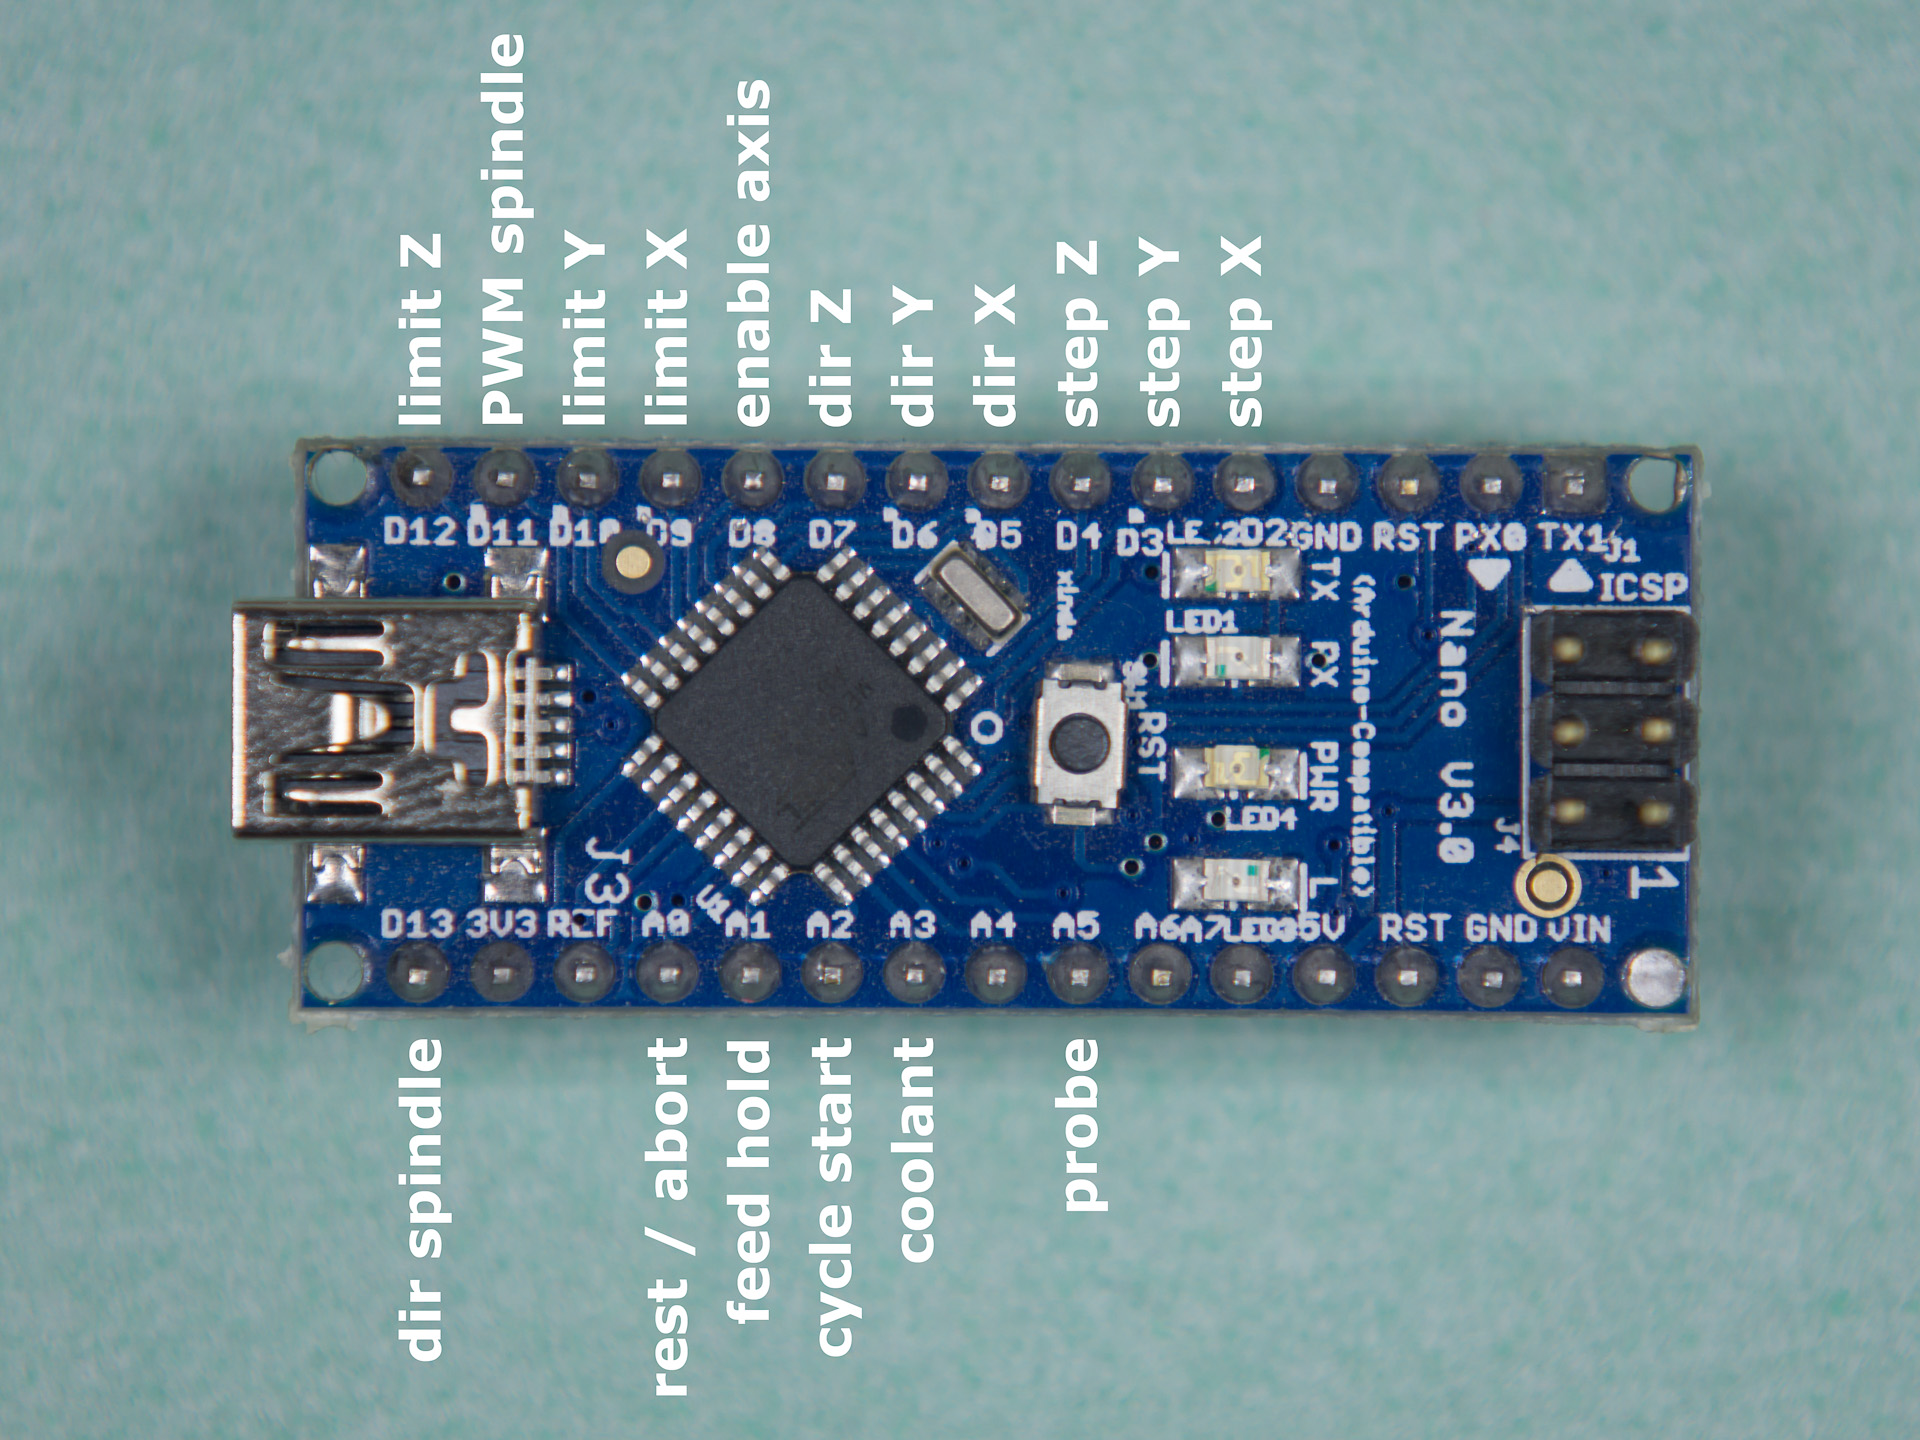
GRBL is an arduino program for controlling each of the XYZ stepping motors on 3-axis machines such as 3D-printers and milling machines. [1] If you study the predefined GRBL pin-outs in photo 2 you will see that none of the PWM (pulse width modulation) pins are available for controlling a servo. This instructable explains how to:
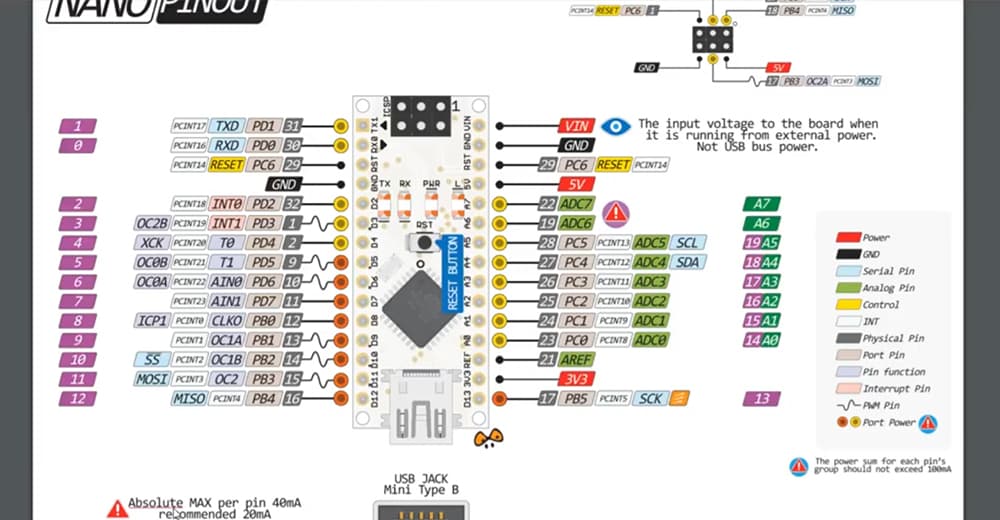
Grbl 0.9 arduino nano pinout portvn
KB5034234: Compatibility update for installing and recovering Windows 11, version 22H2 and 23H2: January 9, 2024
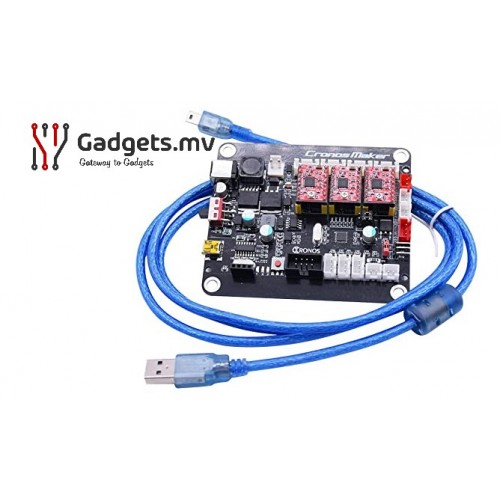
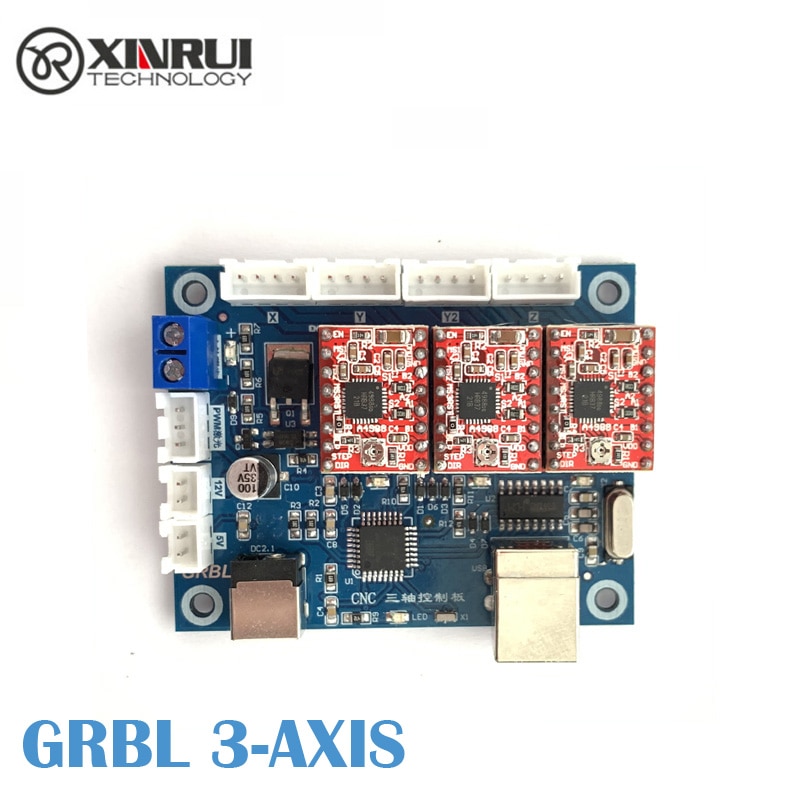
3 Axis All in one CNC Controller Control Board GRBL 0.9
Grbl's system commands do things like control machine state, report saved parameters or what Grbl is doing, save or print machine settings, run a homing cycle, or make the machine move faster or slower than programmed.

PalmDreams Blog CNC1310 GRBL 0.9j to 1.1h バージョンアップ その3
Start Here If you don't already have Universal Gcode Sender and GRBL installed, click here for a step by step guide to setup your DIY CNC Controller. Universal Gcode Sender Main Screen Display Current GRBL Settings There are quite a few GRBL settings that we can adjust to get our CNC machines to do exactly what we want.

GRBL 0.9J to 1.1H Fazendo Upgrade no Arduino Nano CNC 3018 via XLOADER Fácil YouTube
:100000000c9426040c9438040c9438040c94532952 :100010000c94e0310c9438040c9438040c9438049b :100020000c9438040c9438040c9438040c94d216b4.
Grbl 0.9 arduino nano pinout sakisay
Therefore, i forked latest grbl 0.9j and made same changes for servo support (as in robottini/grbl-servo) in it. Use the PIN D11 to drive the servo. Use the commands M03 Sxxx (xxx between 0 and 255) to rotate the servo between 0-180. The command M05 turn the servo to zero degrees. you can change the pulse duration in the file spindle_control.c:

Hướng dẫn sử dụng grbl 0.9 trên arduino CNC shield v3
{"payload":{"allShortcutsEnabled":false,"fileTree":{"builds":{"items":[{"name":"grbl_0_51_atmega168_16mhz_9600.hex","path":"builds/grbl_0_51_atmega168_16mhz_9600.hex.
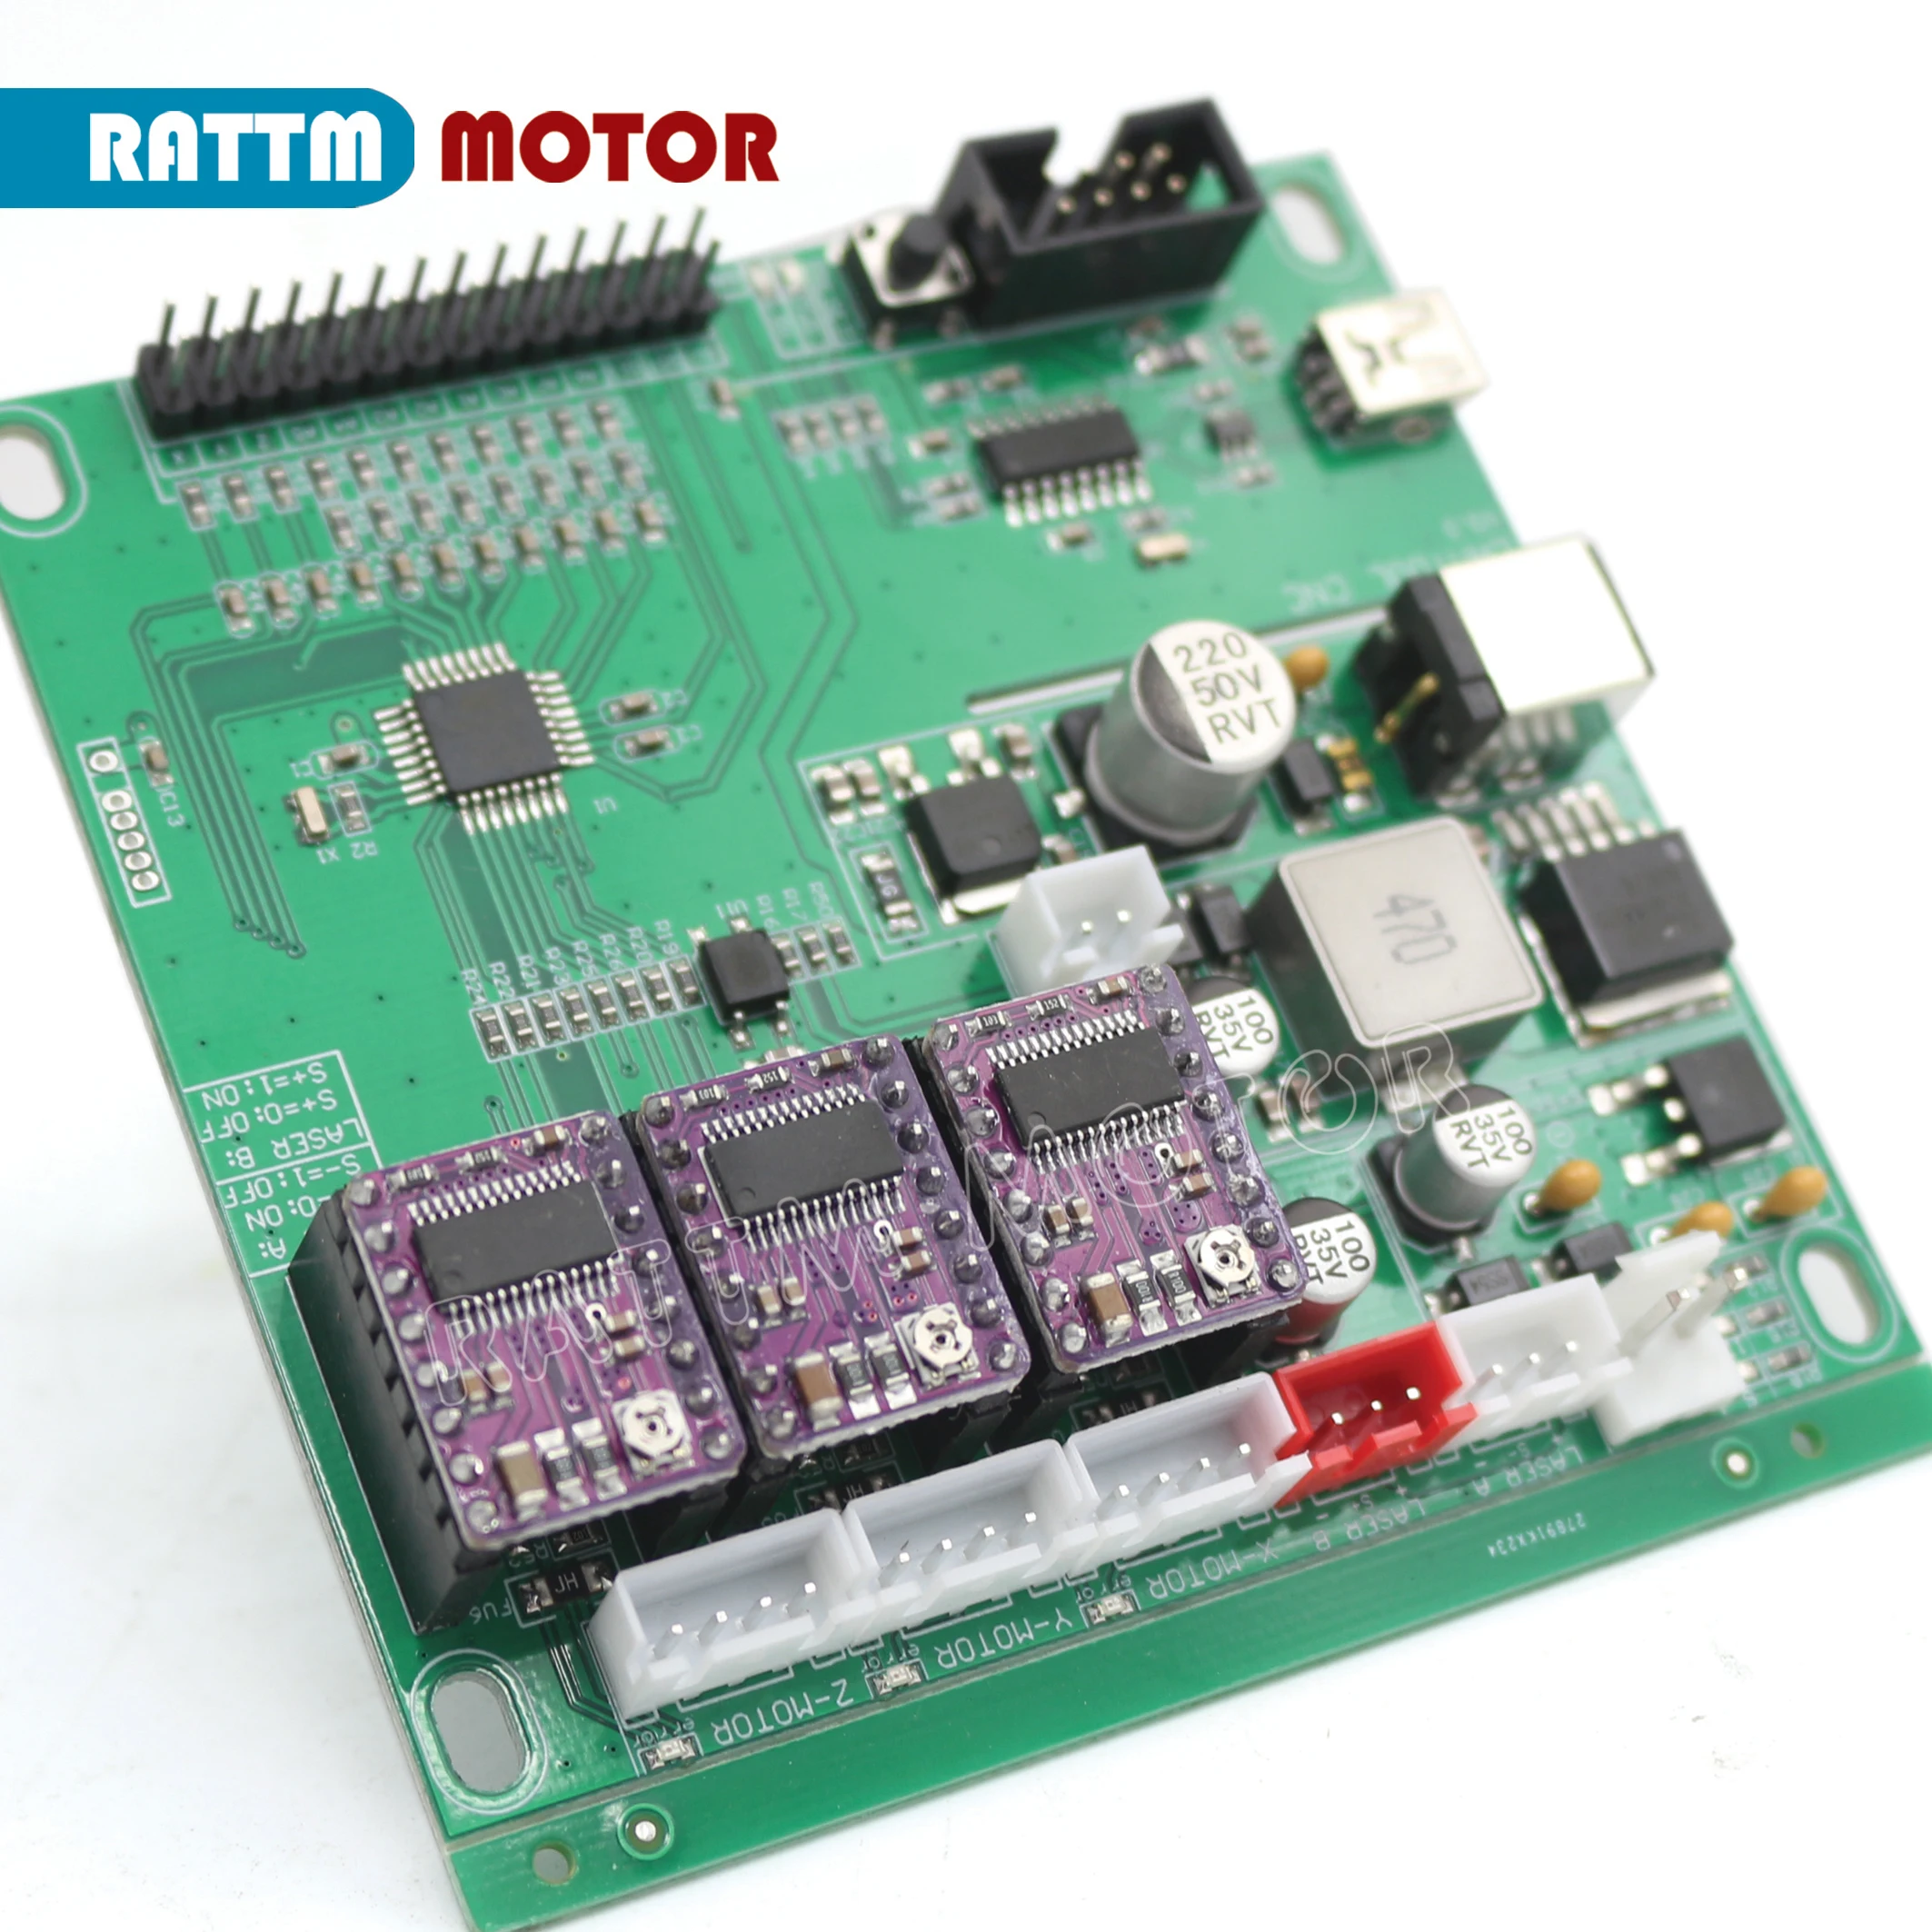
GRBL 0.9 or 1.1 Controller Control Board 3Axis control board Double Y Axis USB Driver Board For
GRBL0.9J or GRBL1.1 3 axis laser engraver control board $23.000 Size Color Weight Online 0.150 Kgs 3 axis laser engraver GRBL control board Connection: USB (USB-CH340) Software: GRBL controller version 0.9 or 1.1, UniversalGcodeSender Master chip: atmel 328P (arduino nano) Stepper motor driver: A4988

Buy 3 Axis GRBL 0.9J USB Port CNC Engraving Machine Control Board Engraver Milling Laser Machine
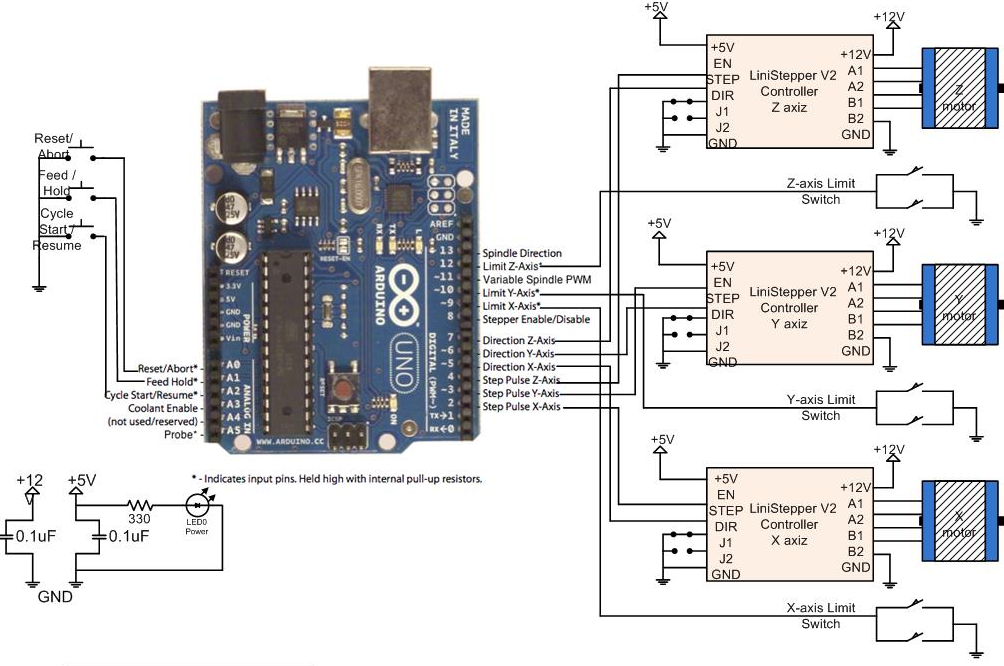
Arduino CNC shield version 3.0 with GRBL v0.9 My experience with Arduino CNC shield was a bit frustrating at the start. This article is about version v3.0 CNC shield. I didn't know anything about this shield, GRBL software and how G-code is sent to CNC machine. So I was pretty unsure about everything I was doing.

Purewords GRBL 0.9 or 1.1 Controller Control Board for 3 Axis Stepper Motor, Double Y Axis USB
The $x=val command saves or alters a Grbl setting, which can be done manually by sending this command when connected to Grbl through a serial terminal program, but most Grbl GUIs will do this for you as a user-friendly feature. To manually change e.g. the microseconds step pulse option to 10us you would type this, followed by an enter: $0=10
Grbl controller 09 software download talentpolre
Grbl will automatically flush Grbl's internal buffers of any queued jogging motions and return to the 'Idle' state.

Strömlinge DIY GRBL 0.9+ board for Arduino Nano
#define RC_SERVO_SHORT 6 // Timer ticks for 0.6ms pulse duration (9 for 0.6ms) #define RC_SERVO_LONG 34 // Timer ticks for 2.5 ms pulse duration (39 for 2.5ms) In order to know the upper and lower limit, you can modify the end of the code line 109 (just to test it). I'm using grbl-servo from robotini's repo but it is based on 0.9i (we are.
GRBL based CNC build
1 9180094 on Jan 22, 2021 638 commits build Git fix for empty directory. Makefile updated. 10 years ago doc Moved Grbl logo files to separate repo. 7 years ago grbl Non-CoreXY compiling fix. 8 years ago .gitignore Merge branch 'edge' 10 years ago COPYING Homing alarm upon no switch. Licensing update. 10 years ago Makefile

Buy Purewords GRBL 0.9 or 1.1 Controller Control Board for 3 Axis Stepper Motor, Double Y Axis
But, as you have an genuine Uno, you can skip all that trouble, and use the Grbl Flashing tool in OpenBuildsCONTROL. 1) install control. 2) click Wizards and Tools, Grbl Flashing tool. 3) Select OpenBuilds BlackBox from the list, its the same as a genuine Uno. Peter van der Walt | OpenBuilds Team.
